Are you ready to launch your own website using WordPress on Bluehost? Congratulations on taking this exciting step towards establishing your online presence! In this comprehensive guide, we will walk you through the process of installing WordPress on your Bluehost domain. By the end of this tutorial, you will have a fully functional WordPress website up and running.
Before we dive into the installation process, let’s briefly discuss why Bluehost is a popular choice for hosting WordPress websites. Bluehost is officially recommended by WordPress.org and is known for its reliability, speed, and excellent customer support. With Bluehost, you can easily install WordPress with just a few clicks, making it an ideal choice for beginners and experienced users alike.
Now, let’s get started with the step-by-step guide on how to install WordPress on your Bluehost domain:
Step 1: Sign up for a Bluehost account
If you haven’t already signed up for a Bluehost account, you can do so by visiting the Bluehost website and selecting a hosting plan that best suits your needs. Bluehost offers a variety of hosting plans, including shared hosting, WordPress hosting, VPS hosting, and dedicated hosting. Once you have selected a plan, follow the on-screen instructions to complete the sign-up process.
Step 2: Log in to your Bluehost account
After signing up for a Bluehost account, log in to your Bluehost control panel using the login credentials provided to you. Once logged in, you will see the Bluehost dashboard, where you can manage your hosting account and domain settings.
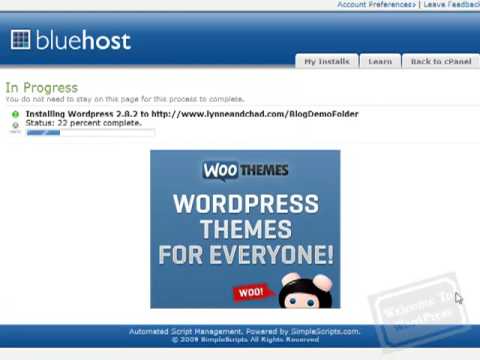
Step 3: Install WordPress
To install WordPress on your Bluehost domain, locate the ‘Website’ section in the Bluehost dashboard and click on the ‘Install WordPress’ icon. This will take you to the WordPress installation page, where you can select the domain on which you want to install WordPress.
Step 4: Configure WordPress settings
After selecting the domain, you will need to configure the basic settings for your WordPress installation, such as the site name, site description, admin username, and password. Make sure to choose a strong password to secure your WordPress website.
Step 5: Complete the installation
Once you have configured the settings, click on the ‘Install Now’ button to start the WordPress installation process. Bluehost will automatically install WordPress on your domain, and you will receive a confirmation message once the installation is complete.
Step 6: Access your WordPress dashboard
After the installation is complete, you can access your WordPress dashboard


