Are you looking to set up a WordPress site on Bluehost but feeling a bit overwhelmed by the process? Don’t worry, I’ve got you covered! In this step-by-step guide, I’ll walk you through the process of setting up your very own WordPress site on Bluehost. By the end of this tutorial, you’ll have a fully functional website up and running in no time.
Bluehost is a popular web hosting service that is known for its reliability, speed, and excellent customer support. It’s also one of the recommended hosting providers by WordPress.org. So, if you’re looking for a reliable hosting service for your WordPress site, Bluehost is a great choice.
Let’s dive into the process of setting up your WordPress site on Bluehost:
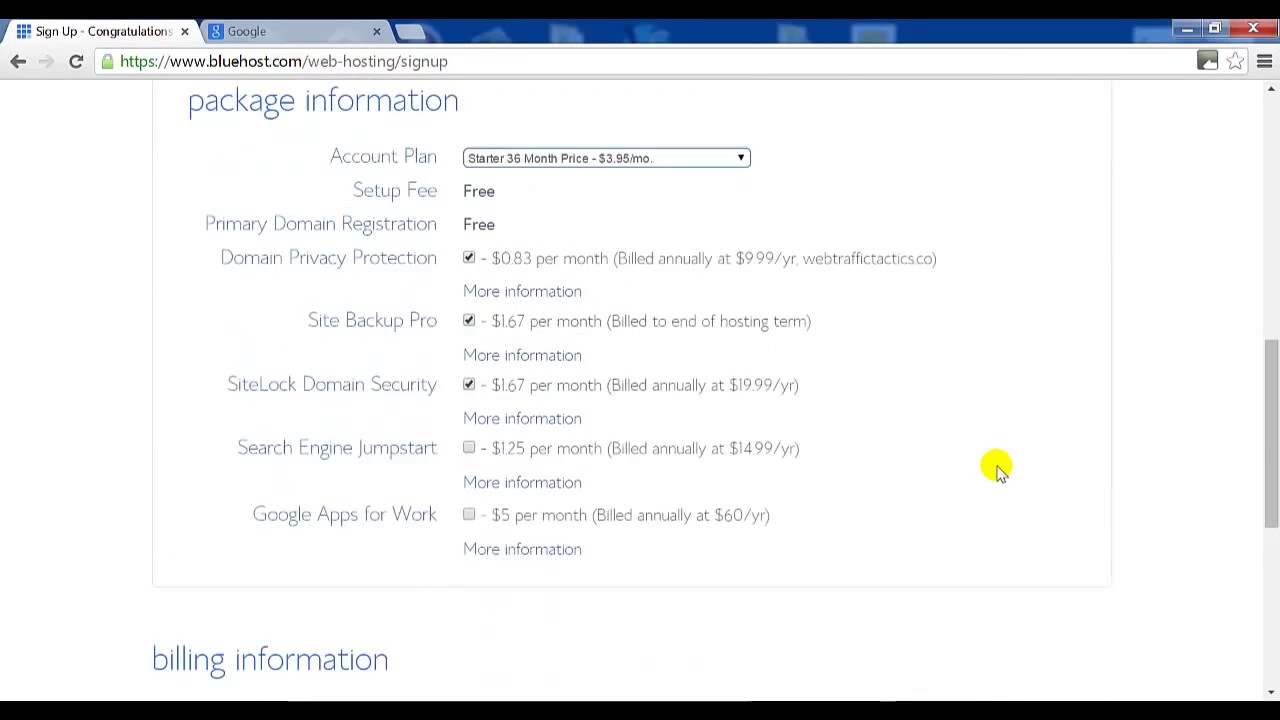
Step 1: Sign Up for Bluehost
The first step is to sign up for a Bluehost account. You can visit the Bluehost website and choose a hosting plan that best suits your needs. Bluehost offers various hosting plans, including shared hosting, VPS hosting, and dedicated hosting. For beginners, shared hosting is usually the best option.
Step 2: Choose a Domain Name
Once you’ve signed up for a Bluehost account, you’ll need to choose a domain name for your website. Your domain name is your website’s address on the internet (e.g., www.yourwebsite.com). Bluehost offers a free domain name for the first year with all hosting plans, which is a great bonus.
Step 3: Install WordPress
After choosing your domain name, you can easily install WordPress on Bluehost. Bluehost offers a one-click WordPress installation feature, making the process quick and straightforward. Simply log in to your Bluehost account, go to the control panel, and click on the “Install WordPress” button. Follow the on-screen instructions to complete the installation process.
Step 4: Customize Your Website
Once WordPress is installed, you can start customizing your website. Choose a theme that fits your brand and customize it to your liking. You can also install plugins to add additional functionality to your site, such as contact forms, social media integration, SEO tools, and more.
Step 5: Create Content
With your website set up and customized, it’s time to start creating content. Add pages, blog posts, images, and videos to your site to engage your audience and drive traffic. Remember to optimize your content for search engines by using relevant keywords and meta tags.
Step 6:


