Are you ready to start your own blog but not sure where to begin? Look no further! In this step-by-step tutorial, we will guide you through setting up a blog using Bluehost and WordPress. By the end of this tutorial, you will have your very own blog up and running, ready to share your thoughts, ideas, and creations with the world.
Bluehost is a popular web hosting service that offers affordable hosting plans and excellent customer support. WordPress, on the other hand, is a user-friendly content management system that powers millions of websites worldwide. By combining Bluehost’s hosting services with WordPress’s powerful blogging platform, you can create a professional-looking blog without any technical expertise.
Let’s get started!
Step 1: Choose a Domain Name and Sign Up for Bluehost
The first step in creating a blog is to choose a domain name. Your domain name is your blog’s address on the internet, so choose a name that is relevant to your blog’s content and easy to remember. Once you have chosen a domain name, head over to Bluehost’s website and sign up for a hosting plan that suits your needs. Bluehost offers a variety of hosting plans, so choose the one that best fits your budget and requirements.
Step 2: Install WordPress on Bluehost
After signing up for a hosting plan with Bluehost, you will need to install WordPress on your hosting account. Fortunately, Bluehost makes this process easy with its one-click WordPress installation feature. Simply log in to your Bluehost account, navigate to the control panel, and click on the “One-Click Installs” button. Select WordPress from the list of available applications and follow the on-screen instructions to complete the installation process.
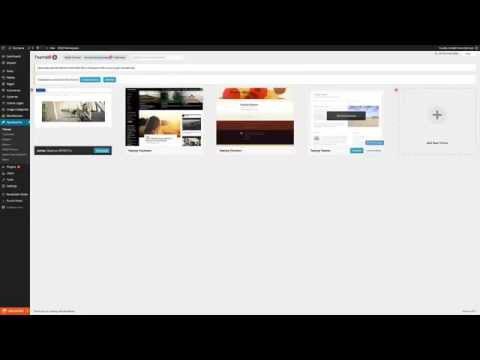
Step 3: Customize Your Blog’s Design
Once WordPress is installed on your Bluehost account, you can start customizing your blog’s design. WordPress offers a wide range of themes and customization options, allowing you to create a unique and visually appealing blog. Choose a theme that reflects your blog’s content and personality, and customize it to suit your preferences. You can also add plugins to enhance your blog’s functionality and add new features.
Step 4: Create Your First Blog Post
With your blog set up and customized, it’s time to create your first blog post. Simply log in to your WordPress dashboard, click on the “Posts” tab, and then click on “Add New.” Enter a title for your blog post, write your content in the text editor


