Are you looking to set up a website using Bluehost and WordPress? You’re in the right place! In this step-by-step tutorial, I’ll guide you through the process of installing WordPress on Bluehost. Whether you’re a beginner or have some experience with website creation, this guide will help you get your website up and running quickly and easily.
Before we dive into the tutorial, let’s talk a little bit about Bluehost and why it’s a popular choice for hosting WordPress websites. Bluehost is one of the largest web hosting companies in the world and is officially recommended by WordPress.org. They offer a range of hosting plans to suit different needs and budgets, and their one-click WordPress installation makes it easy for beginners to get started.
Now, let’s get started with the tutorial on how to install WordPress on Bluehost:
Step 1: Sign Up for a Bluehost Account
The first step is to sign up for a Bluehost account if you haven’t already. You can visit the Bluehost website and choose a hosting plan that suits your needs. Once you’ve selected a plan, you’ll need to register a domain name or transfer an existing one to Bluehost.
Step 2: Log in to Your Bluehost Account
After signing up for a Bluehost account, you’ll receive an email with your login credentials. Use these credentials to log in to your Bluehost account.
Step 3: Access the Control Panel (cPanel)
Once you’re logged in, you’ll be taken to the Bluehost dashboard. From here, you can access the control panel (cPanel) by clicking on the “Advanced” tab at the top of the page.
Step 4: Install WordPress
In the cPanel, scroll down to the “Website” section and click on the “WordPress” icon. This will take you to the WordPress installation page. Click on the “Install” button to begin the installation process.
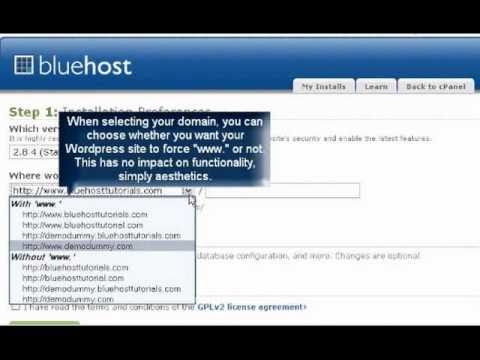
Step 5: Configure Your WordPress Installation
You’ll need to fill in some details to configure your WordPress installation. Choose the domain name where you want to install WordPress, enter a site name and description, create an admin username and password, and enter your email address. You can also choose a theme for your website at this stage.
Step 6: Complete the Installation
After filling in all the necessary details, click on the “Install” button to complete the installation process. Bluehost will install WordPress on your chosen domain, and you’ll receive a confirmation


