Bluehost Tutorial – How To Creating Subdomains With Bluehost
Are you looking to expand your website’s capabilities and organization? Creating subdomains can be a powerful way to achieve this goal. Subdomains allow you to create separate sections of your website with unique URLs, which can help with organization, navigation, and even SEO. In this Bluehost tutorial, we will walk you through the process of creating subdomains with Bluehost, a popular web hosting provider known for its user-friendly interface and reliable service.
Step 1: Log in to your Bluehost account
The first step in creating subdomains with Bluehost is to log in to your Bluehost account. Once you are logged in, navigate to the cPanel (control panel) of your hosting account. The cPanel is where you can manage all aspects of your website, including creating subdomains.
Step 2: Find the Subdomains section
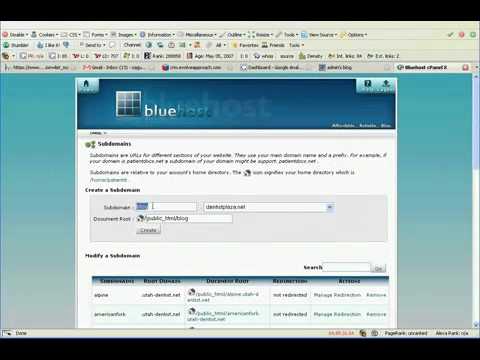
In the cPanel, look for the “Domains” section, where you will find the option to create subdomains. Click on the “Subdomains” icon to access the subdomain creation tool.
Step 3: Create a new subdomain
To create a new subdomain, you will need to fill out a few fields in the subdomain creation tool. First, enter the name of the subdomain you want to create. This can be anything you like, such as “blog,” “shop,” or “support.” Next, select the domain under which you want to create the subdomain. If you have multiple domains associated with your Bluehost account, make sure to choose the correct one.
Step 4: Set the document root
The document root is the directory on your server where the files for the subdomain will be stored. By default, Bluehost will suggest a document root based on the name of the subdomain you entered. You can either accept this suggestion or customize the document root to your liking.
Step 5: Create the subdomain
Once you have filled out all the necessary fields, click on the “Create” button to create the subdomain. Bluehost will then set up the subdomain for you, and you will receive a confirmation message once the process is complete.
Step 6: Upload files to the subdomain
Now that you have created the subdomain, you can start uploading files to it. You can use an FTP client like FileZilla to upload files to the document root directory of the subdomain. This will allow you


