BlueHost Hosting – How to Setup & Install WordPress! – Tutorial
Are you ready to create your own website? Look no further! BlueHost Hosting is the perfect platform to help you get started. In this tutorial, we will guide you through the process of setting up and installing WordPress on BlueHost Hosting. By the end of this article, you will have a fully functional WordPress website up and running.
Why Choose BlueHost Hosting?
BlueHost Hosting is one of the most popular web hosting providers in the market. They offer reliable hosting services with excellent customer support. BlueHost is officially recommended by WordPress.org, making it a trusted choice for WordPress users.
Setting Up Your BlueHost Hosting Account
To get started, head over to the BlueHost website and click on the “Get Started” button. You will be presented with different hosting plans to choose from. Select the plan that suits your needs and click on the “Select” button.
Next, you will be prompted to choose a domain name for your website. If you already have a domain name, you can enter it in the “Use a domain you own” box. If not, you can register a new domain name with BlueHost. Once you have entered your domain name, click on the “Next” button.
On the next page, you will need to fill in your account information, package information, and payment details. Take your time to review the information and select any additional add-ons you may need. BlueHost offers various add-ons such as domain privacy, site backup, and security features. Once you have filled in all the required information, click on the “Submit” button to complete the registration process.
Installing WordPress on BlueHost Hosting
After completing the registration process, you will receive a confirmation email from BlueHost with your login details. Use these details to log in to your BlueHost account.
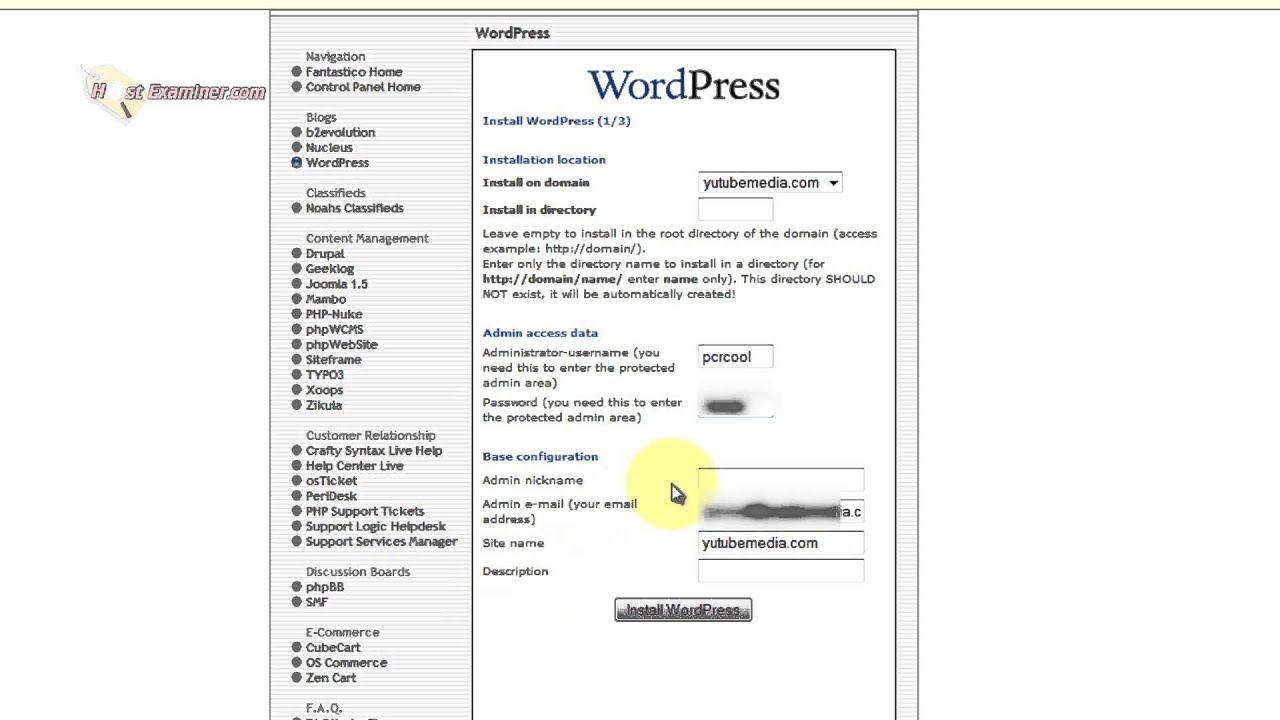
Once logged in, you will be taken to the BlueHost dashboard. From here, scroll down to the “Website” section and click on the “Install WordPress” button.
On the next page, you will be prompted to select the domain on which you want to install WordPress. Choose the domain name you registered or the one you already own from the drop-down menu. After selecting the domain, click on the “Next” button.
BlueHost will now ask you to enter your website details, including the site name, username, and password for your WordPress admin account. Make sure to choose a strong password to secure your website


